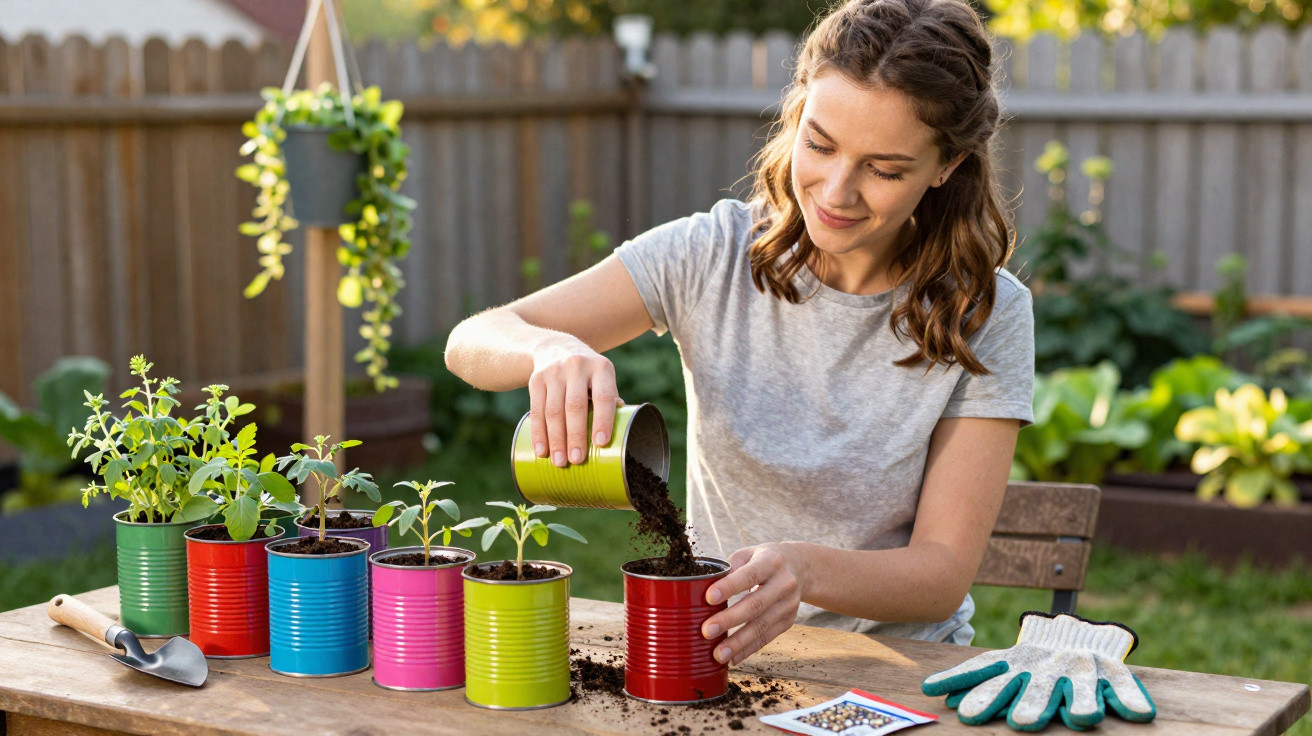
With just a few simple steps, empty food tins can become rustic planters that take up hardly any room, cost almost nothing and look particularly good outdoors. Gardeners in the United Kingdom are currently demonstrating how even the smallest balcony can be turned into a fragrant mini herb corner this way. It works just as well in Munich, Vienna or Zurich.
Why food tins deserve a second life outdoors
Empty tins usually end up in household recycling. Sensible, of course – yet it is also a little wasteful. These round containers offer exactly what many balcony and amateur gardeners need: they are sturdy, weather-resistant and free.
Waste becomes a planter: food tins are ideal for small herb gardens on a balcony, windowsill or garden fence.
British hobby gardener Simon Akeroy shows online how he does it. Rather than buying new plastic cachepots, he drills a few holes into the tins, fills them with compost and fixes them to a fence, balcony railing or house wall. The mini herb garden is then ready.
The idea suits the current mood: more people are focusing on reducing waste and looking for affordable ways to add greenery. Those living in rented accommodation often have little more than a narrow balcony or windowsill. This is where tins come into their own – they can be hung on the wall, leaving the floor clear.
Benefits of a tin garden at a glance
- No purchase costs: Empty tins are already available at home.
- Less plastic: Existing materials are reused instead of buying new plant pots.
- Space-saving: Perfect for narrow balconies and very small courtyards.
- Flexible: They can be moved, repositioned or added to whenever needed.
- Decorative: Anything is possible, from bare metal to bright paintwork.
How to turn a tin into a herb planter
The conversion sounds almost too straightforward to be true, but it works remarkably well. The key requirements are clean tins and a few holes to allow surplus water to drain away.
Step 1: Clean and prepare the tins
Rinse the empty food tins thoroughly until no food residue can be seen or smelled. Peel off the paper labels, or soak them off in warm water. Paint will then adhere better later on – and mould has no chance to develop.
Any small sharp edges can be bent over slightly with pliers. This extra step is particularly worthwhile if children are helping with the project.
Step 2: Create holes for drainage and hanging
The tin now needs ventilation and drainage. Turn it upside down and drill or punch several small holes through the base using a nail. This prevents waterlogging, which can quickly cause roots to rot.
If the tins are to be hung up, add a small hole near the top at the back as well. The wire or cord can later be passed through this opening.
Crucial: drainage holes in the base of the tin. Without them, almost every plant will suffocate in wet growing medium.
Step 3: Make a hanger from a coat hanger or cord
An old wire coat hanger is especially useful. It can be shaped with pliers into a hook that fits through the hole in the side of the tin. The other end forms a loop for a nail, hook or trellis.
Anyone without wire can use sturdy cord or jute twine instead. Simply thread it through the hole, tie it securely and use it as a hanger. For balcony railings, two loops on the left and right are often enough.
Step 4: Fill with peat-free compost
It is now time to add compost to the tin. Many gardeners deliberately choose peat-free potting compost or specialist herb compost. Peat extraction destroys bogs, something that is easily avoided by using alternative growing media.
Do not fill the tin right to the top; leave a gap of roughly two finger-widths. This prevents compost from washing over the edge during watering.
Which herbs are particularly suitable
For a first attempt, many people choose familiar kitchen herbs. They grow compactly, have an intense fragrance and cope well with a fair amount.
| Herb | Characteristics | Works well with |
|---|---|---|
| Parsley | Likes partial shade and needs regular watering | Soups, stews, potatoes |
| Chives | Hardy and repeatedly produces new growth | Scrambled eggs, light meals, salads |
| Thyme | Tolerates dry conditions and loves sunshine | Roasted vegetables, meat, Mediterranean cooking |
| Mint | Spreads readily – ideally contained in a tin | Tea, desserts, summer drinks |
Those who enjoy cooking are best off planting a small selection and hanging the tins within easy reach of the kitchen. On a windowsill beside the hob, herbs can be harvested quickly without having to go outside in the rain.
Styling ideas: from industrial style to pastel romance
Almost anything goes when it comes to appearance. Some people leave the raw metal untouched – a deliberately simple look that suits modern balconies well. Over time, a light patina develops, adding even more character.
For a more playful effect, use acrylic paint or exterior spray paint. Popular options include:
- Pastel shades such as sage green, pale blue or rose pink
- Simple black-and-white combinations using chalk paint
- Colourful patterns, dots or stripes painted by children
A weatherproof marker can be used to write the herb names directly on each tin. Everyone can immediately see what is growing there, while the display looks like a lovingly made DIY project.
How to make the most of the space
The idea becomes especially appealing when several tins are displayed together. Three to five containers in a row already create a small yet productive herb wall. Even a dull garage or shed wall can be given colour and fragrance in this way.
Many people combine herbs with flowering plants. Some tins can hold trailing flowers, while others contain mixtures of wildflower seeds. This benefits insects – and looks far more striking than an empty wooden fence.
With only a few tins, a bare wall becomes a colourful, living surface that attracts bees, bumblebees and butterflies.
Tips for greater success with a tin garden
- Avoid waterlogging: when in doubt, water more often but use less water each time.
- Avoid excessive heat: metal sides can become hot in direct midday sun, so choose heat-tolerant herbs for those spots.
- Replenish nutrients: nutrients are quickly used up in such a small volume of compost. An occasional liquid organic fertiliser is usually sufficient.
- Allow for rust or prevent it: those who like a shabby look can let the tins age naturally. Anyone who does not can protect them with clear varnish.
What to consider: risks and limitations
Charming as the idea is, food tins are too small for large vegetable plants such as tomatoes or courgettes. Their roots need more room; otherwise, the plants remain stunted and dry out very quickly.
It is also worth carrying out a quick check on particularly windy balconies: are the tins hanging securely enough? Are the hooks firmly fixed in the wood or brickwork? If in doubt, fit an additional support or place the containers on a sturdy surface.
Anyone unsure whether the inside of a tin is suitable for edible plants can use a thin liner, such as a small plastic pot or a paper pot that fits neatly inside. This means the roots barely come into contact with the metal.
How the trend can be easily expanded
Those who enjoy the idea can quickly think on a larger scale. Similar projects work with old coffee tins, metal boxes or metal buckets. Even discarded teapots or forgotten baking tins can be planted up and placed outside.
It becomes particularly interesting when several recycled materials are brought together: a row of tins, an old pallet frame filled with compost beside them, and an old wooden crate holding strawberry plants underneath. Bit by bit, this creates an individual backyard garden that looks far more expensive than it was.
Ultimately, the tin trend is more than an attractive craft project. It shows how small everyday changes can save resources – and how much quality of life a few handfuls of herbs and flowers can bring to the immediate surroundings. Often, a single empty tin is enough to spark a new favourite project.












Comments
No comments yet. Be the first to comment!
Leave a Comment