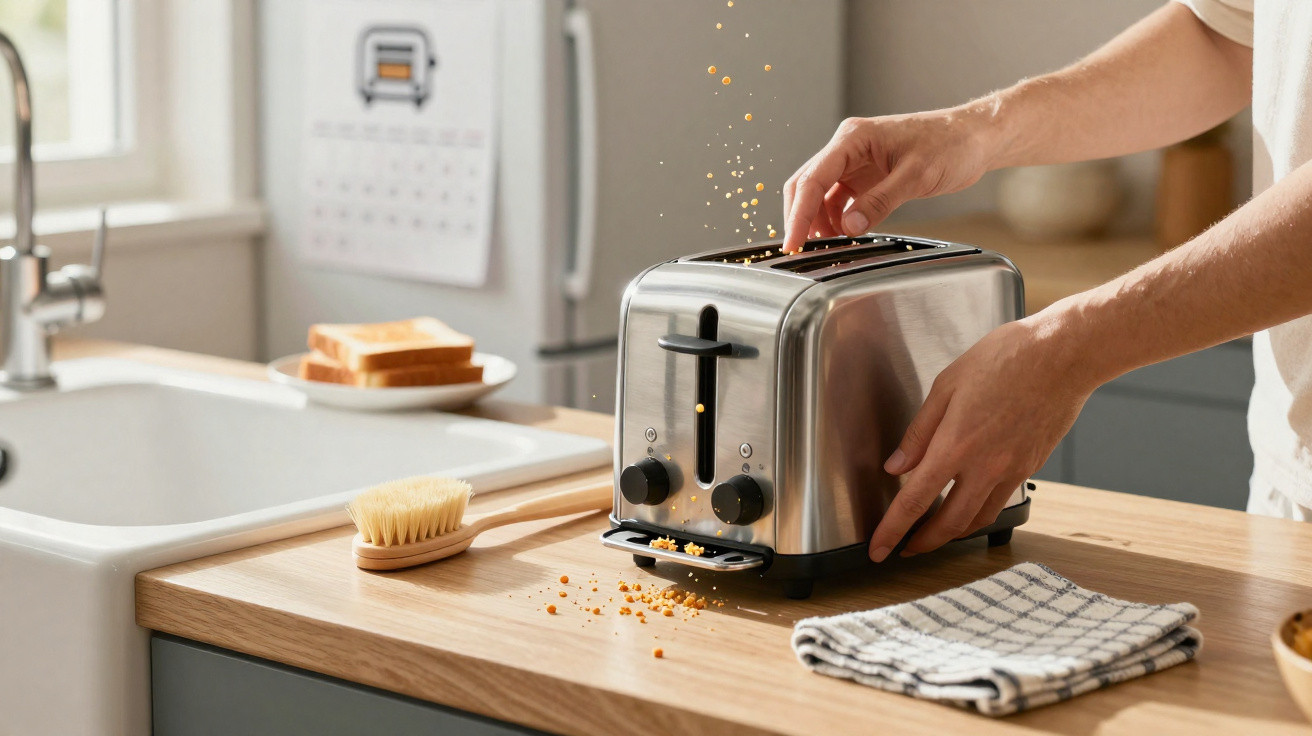
One morning, the toast pops up with its familiar little click, but a burnt smell drifts into the kitchen. You inspect the slice, which is more or less untouched, then spot the layer of browned crumbs at the bottom of the toaster that you had vaguely noticed the week before. We all know that moment when an everyday appliance suddenly seems rather less reassuring. Between bread grains, pieces of brioche and cereal residue, the base of a toaster quickly becomes a real food-dust drawer. Let us be honest: nobody truly deals with this every day. Yet a few minutes of cleaning each month are enough to prevent unpleasant smells, unexpected smoke and unsafe actions. The right habit starts before you even reach for a sponge.
Forgotten crumbs that can spoil breakfast
A toaster is one of those appliances we use without a second thought. It sits beside the coffee machine, often wedged between a tea tin and a jam jar, producing slice after slice without asking for any attention. That is, until blackened crumbs start smoking in the bottom of the appliance. It is not necessarily dramatic, but the smell lingers and immediately suggests that something is wrong. Bread residue builds up with every use, especially with thick slices, seeded loaves or generously crumbly brioche.
In a family kitchen, two or three lively breakfasts can sometimes be enough to fill the crumb tray. Léa, a mother of two, said that she thought her toaster had broken down when it began giving off a thin wisp of smoke one Sunday morning: in fact, a large crumb from a country loaf had become lodged near a heating element. After two minutes of cleaning, the appliance was working normally again. This sort of incident may seem insignificant, but it is a straightforward reminder: a toaster is not a miniature oven that can be left to accumulate grime for months.
Dry crumbs are light, yet they can fall into the appliance's hot areas and repeatedly char. The outcome is not just a matter of smell: it can also affect the flavour of the toast and make the worktop dirty more quickly when the appliance is shaken in a hurry. A clean toaster does not magically make better toast, but it does prevent plenty of inconveniences. Monthly cleaning is above all a preventative habit, almost as easy as emptying a coffee maker filter. There is just one non-negotiable rule: never clean the inside while the appliance is plugged in.
The safe way to clean a toaster without damaging it
Before doing anything, unplug the toaster and allow it to cool completely if it has just been used. Place it on a stable surface away from the sink, then gently remove the crumb tray if there is one. Empty it over the bin, then wipe its outer surface with a soft, dry or barely damp cloth. To dislodge remaining debris, carefully turn the appliance upside down over the bin and give it a gentle shake. There is no need to bang it against the worktop: this rough treatment can shift internal parts or damage the non-slip feet.
The most common mistake is trying to reach a stubborn crumb with a knife, fork or spoon. It is tempting, particularly when the piece is visible just beneath the slot, but heating elements are delicate and metal objects do not belong in there. Even when unplugged, the appliance can have a component bent or a protective coating scratched. Choose a small, completely dry soft brush, or a clean paintbrush kept specifically for this purpose. No water in the slots, and do not spray degreaser directly into them either: moisture can seep into places it should never reach.
Effective maintenance often comes down to very little: staying calm, using a light touch and quickly checking the tray. If residue appears stuck on, or an unusual smell remains after cleaning, the appliance manual is still the best guide, as some models have a particular construction.
“When a crumb does not come away easily, the right instinct is not to persist: it is to stop and leave the appliance alone.”
Keep these simple guidelines in mind:
- Unplug the toaster before every clean.
- Empty the crumb tray roughly once a month.
- Use only a brush or dry cloth inside.
- Avoid metal utensils and splashes of water.
The monthly toaster routine that really extends its life
The easiest approach is to link this cleaning task to something you already do: the first weekend of the month, changing the kitchen tea towel or tidying the cupboards. In most cases, three minutes are enough, and this appointment prevents you from discovering a layer of crumbs just as you are welcoming friends or family for brunch. Remember to wipe the outside of the toaster too, especially around the lever and controls, where fingers quickly leave greasy marks. A clean appliance also makes you want to use it with greater peace of mind, particularly in an open-plan kitchen.
Some signs require attention sooner than a routine monthly clean: unusual sparks, smoke that returns without any trapped bread, a damaged cable or a lever that remains stuck. In that situation, it is best to stop using the appliance and consult the manufacturer's recommendations, or a repairer. Cleaning cannot solve everything, and trying at all costs to rescue an old toaster can be a poor decision. Caution can sometimes seem excessive, until the day it prevents an incident. This small routine raises a very simple question: which other everyday objects might also deserve two minutes of attention before they abruptly remind us that we have neglected them?
| Key point | Detail | Benefit for the reader |
|---|---|---|
| Unplug before taking action | Wait until the appliance has cooled completely | Reduces the risk of burns and unsafe handling |
| Empty the tray monthly | Remove dry crumbs over the bin | Limits burnt smells and unexpected smoke |
| Avoid water and metal | Use a soft brush or dry cloth instead | Protects the heating elements and the toaster's lifespan |









Comments
No comments yet. Be the first to comment!
Leave a Comment