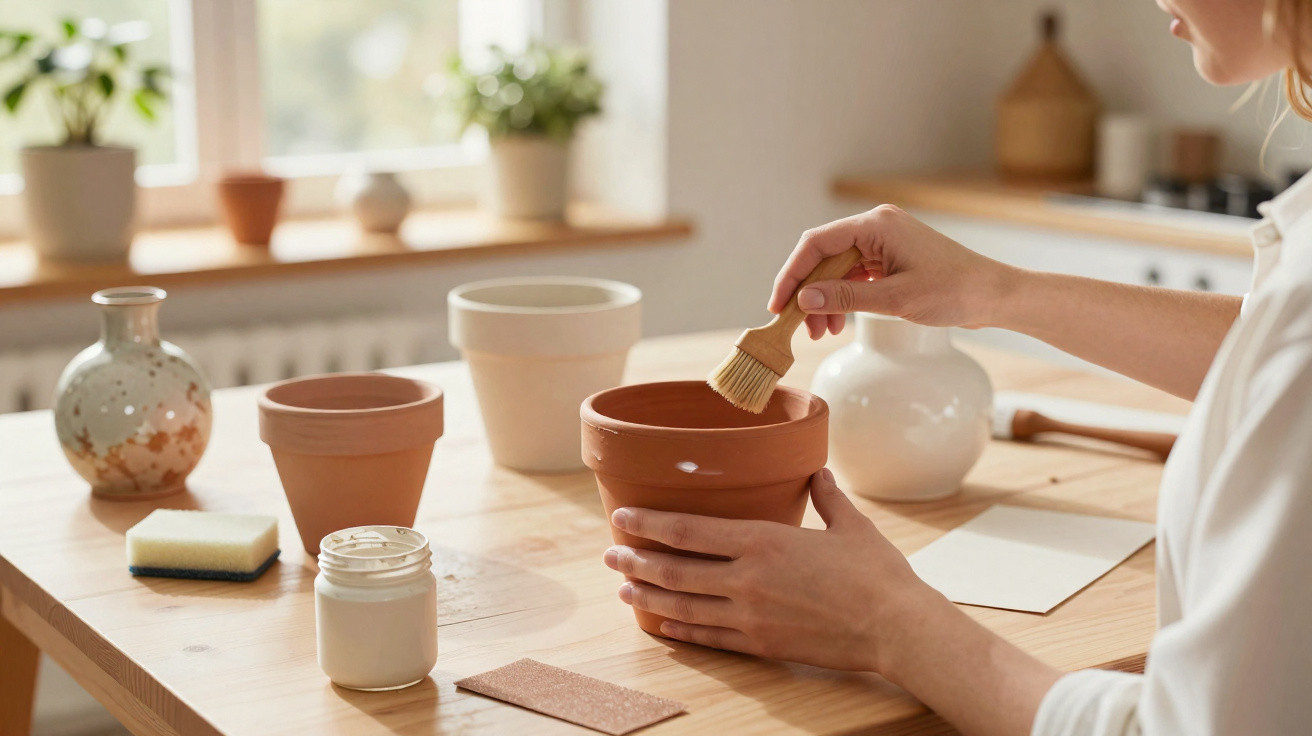
Anyone already imagining their old terracotta pots being wheeled off with the bulky waste can relax: a straightforward trade-inspired technique can turn these classic clay pots into remarkably convincing “ceramic pieces” – without a professional workshop, an airbrush or spending three-figure sums at the DIY store.
Why terracotta pots quickly become unattractive outdoors
Terracotta pots are popular because they breathe, which plant roots appreciate. Outdoors, however, that very quality becomes a drawback. The clay’s microporosity – its many tiny pores – absorbs moisture like a sponge. Water and salts travel through the pot wall to the outside, where they cause:
- white marks from saltpetre and other minerals
- green coatings of algae and moss
- flaking or blistering paint on pots that have already been painted
Applying ordinary acrylic paint straight onto an untreated pot will therefore usually last only a few weeks. The paint peels away as pressure from within forces the layers off. The crucial tip is not to begin on the outside, but on the inside.
“The paint’s durability is decided inside the pot – stopping moisture there gives you a clean, long-lasting finish outside.”
Step 1: clean thoroughly rather than simply wiping it over
Before moving on to paint and effects, the pot needs to be genuinely clean. A quick wipe with a cloth is not enough when limescale, soil and moss have built up over years.
How to carry out the basic clean
- Remove loose dirt: Empty out the soil, pull away old roots and tap off any loose fragments.
- Mix a cleaning solution: Combine lukewarm water with a generous splash of clear household vinegar.
- Scrub: Use a brush, such as a nail brush or scrubbing brush, to work firmly over the entire outside surface and rim.
- Rinse: Wash the pot with clean water so that no vinegar residue remains.
For particularly old pots with heavy deposits, an additional step is worthwhile: place them in a tub of water for 10 to 20 minutes. As the clay absorbs water, the deposits come away far more easily. Afterwards, always allow the pot to dry completely, ideally for one or two days in an airy spot. Direct sunlight can create stress cracks, so it is better to leave it in the shade.
For a neater finish, lightly sand the surface with fine sandpaper. This smooths small bumps, edges and rough patches, allowing the later paint layer to adhere more evenly.
Step 2: seal the inside so the outside paint lasts
The second and most important stage is to block moisture coming from inside the pot. Ignore this and the work will need doing again as soon as the next wet autumn arrives.
Suitable products for the inner surface
- Boat varnish / yacht varnish: So-called marine varnish is designed for prolonged damp conditions and is highly durable.
- Foundation waterproofing: Cementitious waterproof slurry or liquid waterproofing products from the building aisle work just as well.
Apply these products only to the inside in one or two thin coats. An ordinary paintbrush is sufficient. Paint the base and rim too, as the route taken by water needs to be completely interrupted. Follow the drying times stated on the packaging exactly; otherwise, blisters may develop later.
Next, apply a coat of acrylic adhesion primer or mineral primer to the outside. This primer reduces the absorbency of terracotta pots and prevents the decorative paint from drying patchily. Spray primer also works, provided the pot has been cleaned beforehand.
“Sealing the inside of the pot like a small basin and priming the outside prevents moisture from rising – and protects every subsequent layer of paint.”
Step 3: a special paint and bicarbonate of soda mix for the “ceramic look”
At the centre of this method is a homemade textured paint. It avoids the need for expensive designer plant pots and requires only two simple ingredients: exterior paint and bicarbonate of soda.
The mixing ratio
A small amount is usually enough for a medium-sized pot. Use this rule of thumb:
| Amount of paint | Amount of bicarbonate of soda |
|---|---|
| 10 cl of acrylic or vinyl paint | 1 heaped tablespoon of bicarbonate of soda |
Stir the mixture thoroughly until no lumps are visible. It will become much thicker, almost like yoghurt. Once applied to the pot, it creates a matt, powdery effect with a subtle grain that resembles handmade ceramics and disguises small imperfections in the clay.
Colours that create a particularly refined effect
- soft terracotta or brick red for a Mediterranean feel
- sage green and other muted greens for a Scandinavian look
- ochre, sand and beige for minimalist balconies
- “nude” shades – pale skin and stone tones – suited to modern interiors
Metallic shades are less suitable because they diminish the matt ceramic effect. Those who still prefer some shine can add a single accent, such as a gold band around the rim.
Applying the textured paint: relaxed is better than overly perfect
Painting is not about achieving flawless uniformity, but about creating character. A wide brush or a small paint roller will do the job perfectly well.
- First coat: Cover the entire outside of the pot, leaving slight brush marks if they occur. Allow at least two hours for it to dry.
- Second coat: Paint all the way around again, this time a little more evenly. The texture will now begin to build visibly.
- Third coat (optional): For very light colours or badly damaged pots, a third layer after around six hours provides a rich result.
Leave the inside of the pot unpainted; only the water-repellent coating should be present there. Once the final coat has been applied, let the pot cure for at least one day, preferably up to 48 hours, before adding compost and plants.
Colour sealing and outdoor care
To make the new “ceramic look” last longer than one season, finish the surface with a matt exterior clear varnish. This protective film shields the colour from UV light and rain, and can be wiped clean if necessary.
Again, work only on the outside. Keep the drainage hole in the base clear so water can run away freely. Combined with a free-draining growing medium – for example one containing sand, expanded clay or fine gravel – this considerably extends the pot’s lifespan.
“With varnish, waterproofing and textured paint, the overall budget per pot often remains well below ten euros because all of the products are sufficient for several containers.”
Practical example: from winter casualty to decorative highlight
Typical candidates are blackened or green-stained terracotta pots that look like ruins after a damp winter. Once emptied, scrubbed with a cleaning brush and treated with a vinegar bath, most dirt and much of the discolouration disappear. The interior is then waterproofed and the exterior primed.
The bicarbonate of soda paint then produces a noticeably more premium appearance, especially when several pots in the same shade but in different sizes are arranged together. On a terrace or balcony, this kind of “collection” can quickly look as though it came from an expensive design boutique – yet it is actually a very down-to-earth DIY project using DIY-store products.
What to watch out for: risks and common mistakes
A few points can reduce the chance of success, but they are easy to avoid:
- Insufficient drying: If the pot is still damp inside, water can become trapped beneath the waterproofing. It is better to wait an extra day.
- Too much bicarbonate of soda: An overly thick mixture is prone to cracking. Adjust the mixing ratio only slightly.
- Frosty periods: Even treated terracotta pots can crack in severe frost. To minimise the risk, move them to a sheltered spot for winter.
- The wrong varnish: Use only products explicitly intended for outdoor use; otherwise, the surface may yellow or become sticky.
More ideas: one project can become several
This technique is not limited to traditional plant pots. Leftover paint can be used on saucers, clay vases or small decorative figures. Even old concrete planters gain a fresher, softer character with primer and textured paint.
Anyone mixing several shades can experiment with colour blocking: a warm terracotta lower section, a pale nude rim and a softly blended transition between them. The matt texture keeps the result calm rather than making it look like garish craftwork.
The idea is especially appealing when budgets are tight: instead of buying new ceramic pots, existing containers can be upgraded. This saves money, prevents waste and adds an individual, handmade feature to balconies, terraces and windowsills.



Comments
No comments yet. Be the first to comment!
Leave a Comment