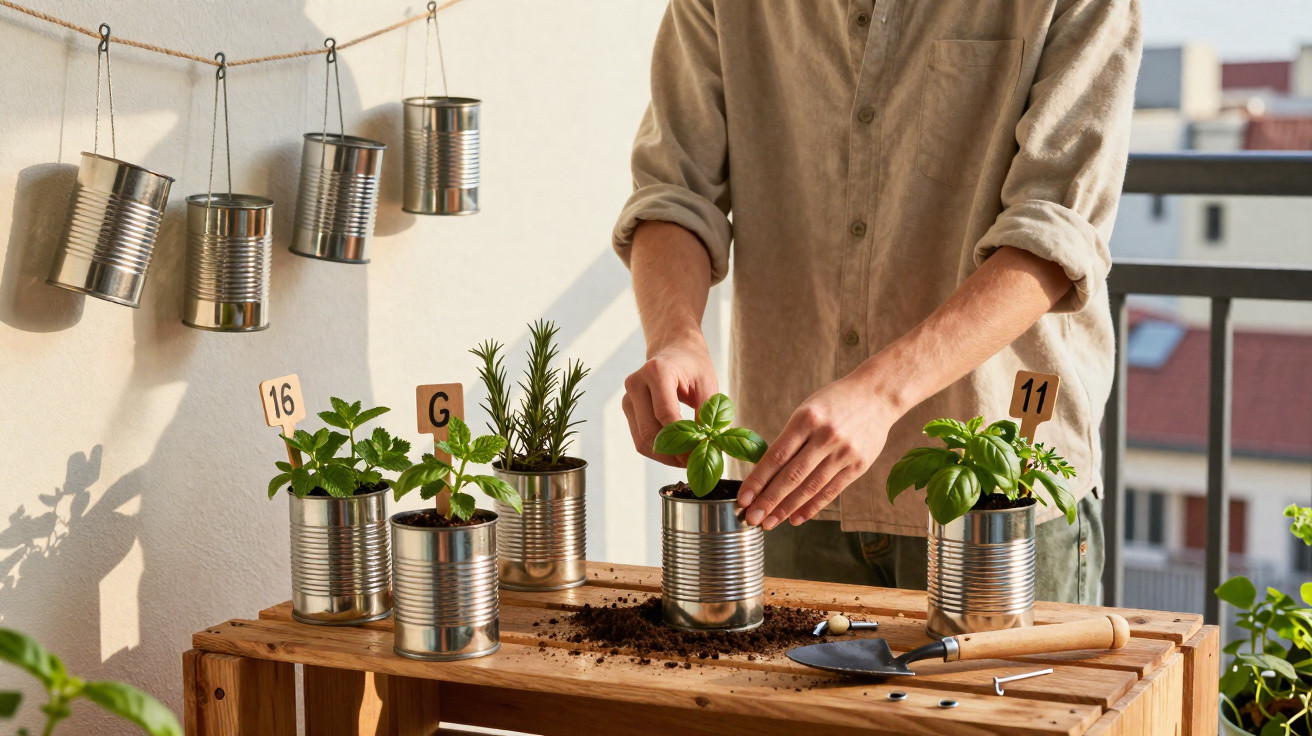
Empty tin cans often go straight into the bin, somewhere between washing-up liquid bottles and household waste. Garden enthusiasts are now urging people not to discard this everyday item without a second thought. With only a few simple steps, a throwaway can becomes an unexpectedly attractive herb planter that makes practical use of even the smallest spaces.
Why tin cans are suddenly so popular in the garden
A British amateur gardener is currently demonstrating how ordinary food cans can become eye-catching features in a green space. Rather than buying new plastic containers, he uses what is already left over: empty tins of tomatoes, beans or soup.
“What appears to be rubbish becomes a free plant pot – ideal for people with limited space and a tight budget.”
The idea is well suited to the current moment. Many households are paying closer attention to spending and looking for more sustainable ways to live. Garden upcycling does both:
- no need to spend money on extra pots
- less plastic used in the garden
- less waste before it even reaches recycling
- fresh herbs to harvest, even from a balcony or windowsill
The concept is particularly useful for tenants with only a tiny balcony or narrow windowsill. Several cans placed side by side can turn a dull fence or bare wall into a fragrant strip of herbs, without taking up valuable floor space.
Step by step: turn a tin can into a herb planter
Converting a food can into a planting container is almost remarkably simple, but a few details can determine whether the project succeeds or fails.
Clean and prepare the tin can
Hygiene comes first. The can needs to be thoroughly clean, as leftover food can go mouldy or attract pests.
- Rinse the can carefully, preferably with hot water and a little washing-up liquid.
- Remove the label, using a sponge or a little oil to loosen any adhesive residue.
- Check the rim for sharp edges and, if necessary, smooth them with a file or bend them over slightly with pliers.
Anyone who prefers a pared-back appearance can leave the metal as it is. For a brighter finish, paint the can once it has dried using weatherproof paint. Pastel shades, a black-and-white design or bold accents all work well.
Do not forget drainage holes
The most common problem with improvised planters is waterlogging. Without an outlet for excess water, roots soon rot.
Several small holes are therefore needed in the base of the can:
- carefully make 3–5 holes in the base with a nail and hammer
- alternatively, drill them using a small cordless drill
- bend any sharp metal edges around the holes slightly inwards
If the can is going to be hung up later, make an additional small hole in the back, just below the rim. This is where the hanger will be attached.
Hang it with a coat hanger or cord
The can looks especially clever when it hangs rather than stands. All that is needed are items often already found in a cupboard: old wire coat hangers or sturdy cord.
A wire hanger can be shaped by hand or with pliers into a hook, then passed through the side hole. Hang the other end from a nail, hook or trellis. Several cans can then be arranged in a row, making this ideal for railings, fences or exterior walls.
Thick string or jute ribbon works just as well: thread it through the side hole, tie a knot, make a loop at the top and secure it to a hook. This gives a more natural, rustic finish.
The right filling: compost and herbs for mini gardens
Once the can is ready, it is time to prepare the inside. Specialists recommend peat-free compost, which protects peatlands while still providing good growing conditions.
“Peat-free compost encourages healthy root growth while also protecting valuable ecosystems.”
Loosely fill the can with compost to just below the rim. If preferred, first add a thin layer of gravel, broken terracotta or coarse sand at the bottom to improve drainage further.
Which herbs are particularly suitable
For beginners, sturdy favourites that cope well with restricted space are recommended:
- Parsley: grows densely, adds plenty of green to the can and suits almost every dish.
- Chives: slender stems that are perfect for soups, sandwiches and dips.
- Thyme: stays relatively compact, enjoys sunny spots and tolerates short dry spells.
- Mint: grows vigorously and is excellent for tea, flavoured water or desserts.
Those with some experience can try mixed planting, such as parsley and chives in one can. The important thing is to pair plants with similar light and watering requirements.
Design ideas: from industrial style to a colourful herb wall
The main appeal of the idea lies in its visual effect. Even three or four cans can add structure to areas that would otherwise remain empty.
Styles to suit every taste
- Minimalist: untreated cans arranged in a row on a fence create a clean, modern look.
- Cottage style: delicately painted cans in pastel colours, combined with flowering herbs and small flowers.
- Boho look: brightly patterned cans, perhaps decorated with spots, stripes or hand lettering.
- Family project: children can paint every can differently, with names or amusing faces, for example.
As well as herbs, you can plant edible flowers, wildflower mixes or small trailing plants. Trailing varieties that gently spill over the rim create an especially soft, lively effect.
Small effort, major benefits: why this project is worthwhile
Very little is needed: cans arise in everyday life anyway, the tools are usually already available, and compost and plants cost very little. In return, you get practical mini gardens that are not only attractive but genuinely useful every day.
“Fresh herbs right outside the front door encourage more mindful cooking – and make ready meals a little less necessary.”
Anyone who regularly reaches for their herb can can season sauces, salads or pasta more spontaneously with fresh leaves. Many soon find they need fewer packets of dried herbs and choose fresh ingredients more often.
There is another benefit, too: projects like this make it less daunting to start gardening in general. If the prospect of ‘proper’ gardening feels intimidating, simply begin with three cans on the kitchen windowsill. When that works, larger projects often follow – a raised bed, a balcony full of pots or a patch in a communal garden.
Tips on care, durability and safety
Metal and weather may initially suggest rust and a short lifespan. In reality, many cans last surprisingly well, particularly in partly sheltered places such as covered balconies.
- Do not leave cans permanently in puddles or damp corners.
- If desired, spray the outside with clear varnish to help prevent rust.
- Check the compost regularly: use a finger test rather than following a rigid watering schedule.
- Replant at least once a year or replace some of the compost.
Parents should also take care with sharp edges. When children are helping, it is worth using a can opener that leaves smooth edges, or quickly finishing rough areas with a file.
If you are hanging many cans on a wall, plan the fixing carefully: use sturdy hooks, secure wall plugs and avoid overly heavy filling. A row of small herb cans weighs less than large planters, but everything must still be firmly secured, especially on balconies on higher floors.
Ultimately, the lesson is simple: what was carelessly thrown away yesterday may be fragrant, flowering and brightening everyday life tomorrow. The empty can in the kitchen suddenly becomes the first building block of your own mini garden, offering a small, touchable piece of greenery even without a large garden.









Comments
No comments yet. Be the first to comment!
Leave a Comment