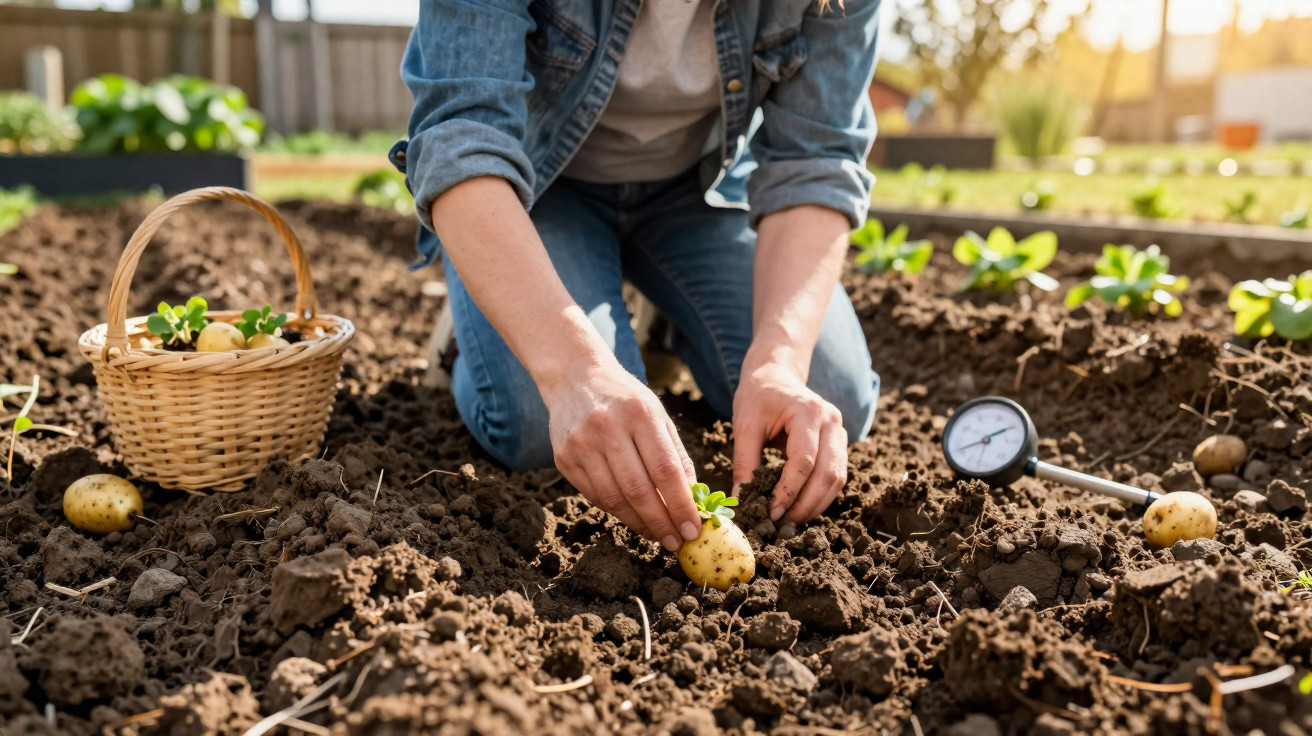
Plant labels, well-meaning advice from neighbours and lunar calendars tend to create more confusion than clarity. What matters is not a fixed date on the calendar, but the conditions beneath the ground. Professional gardeners look for clear indicators: temperature, soil texture and healthy seed potatoes. Keep an eye on these factors and, by late summer, you can expect boxes full of firm potatoes rather than a disappointingly sparse store cupboard.
The right time to plant potatoes: follow the soil, not the calendar
The key question is this: when does the soil become welcoming enough for potatoes? Specialists offer a clear range: at a depth of 10 centimetres, the soil should be at least 7 to 10°C, preferably a little warmer.
"As a rule of thumb, tubers freeze below 7°C, while above 10°C they really get going."
The suitable planting period varies considerably by location:
- Mild areas and coastal locations: usually from late March to early April
- Mid-altitude areas and most of Germany: roughly from mid-April to early May
- Cooler areas and upland regions: often not reliably suitable until late April or early May
A soil thermometer from a garden centre, usually costing less than £15, removes the guesswork. Push it 10 centimetres into the soil. Once it reads around 10°C or more for several consecutive days, the seed potatoes can be planted.
A quick sitting test for impatient gardeners
If you do not have a thermometer, there is a very straightforward alternative: wearing the clothes you would normally use for gardening, sit directly on the bare soil for a few minutes.
- If you feel noticeably cold after a short time, the soil is still too chilly.
- If you can remain seated comfortably for several minutes without shivering, conditions are looking promising.
This method does not replace a measuring device, but it provides a surprisingly dependable indication. Experienced gardeners advise planting a week later rather than putting potatoes into icy soil too soon. Early planting can cause growth to stall, encourage rot and produce weak plants.
Preparing the soil: where the harvest quantity is decided
Potatoes thrive in loose, deep and well-drained ground. Waterlogging and heavy, compacted soil restrict growth and make disease more likely. For a quick assessment, take a handful of soil and squeeze it.
- If it forms a firm, sticky ball, clay or loam is dominant.
- If the clump crumbles easily and remains fairly friable, the texture is ideal.
Where soil is too heavy, it is worth starting the preparation in autumn or early winter:
- Spread 3 to 4 centimetres of mature compost over the area.
- Work in some sand to improve the soil structure.
- Leave large clods in place, as frost will break them down naturally.
"Professional tip: Potatoes should return to the same plot only every four years to help prevent soil-borne diseases."
Warming the ground for an earlier potato harvest
For anyone aiming to harvest particularly early potatoes, the soil can be given a little encouragement a few weeks before planting:
- Cover the plot with black plastic sheeting or black horticultural fleece.
- Weight down the edges well so that the wind cannot lift the covering.
- After around two to three weeks, the upper layer of soil will have warmed by 2 to 3°C.
This can bring early varieties forward by one to two weeks. That difference is especially valuable where summers are short.
Choosing the right seed potatoes: quality over leftovers
A common mistake is using supermarket potatoes as planting stock. They are often treated with sprout inhibitors. Even when they do shoot, they frequently produce weak, disease-prone plants and a poor crop.
Certified seed potatoes from a specialist supplier are a far better choice. They are healthy, true to variety and inspected. The expected yields show why this is worthwhile:
| Quantity of seed potatoes | Expected harvest |
|---|---|
| 1.5 kg of seed potatoes | around 10–20 kg of eating potatoes |
Chitting potatoes for a head start of several weeks
To achieve an early, plentiful crop, chit the tubers before planting. The process is straightforward:
- Remove the seed potatoes from their net bags 4 to 6 weeks before the planting date.
- Place them with the ‘eyes’ facing upwards in egg boxes or shallow trays.
- Keep them somewhere bright but cool, such as a light cellar, an unheated hallway or a garage with a window.
- Wait until the shoots are firm and around 1 to 2 centimetres long.
"Well-chitted potatoes establish themselves in the bed much faster and deliver noticeably higher yields."
On planting day: getting the tubers into the ground
Once planting day has arrived, it is time for the practical work. Choose a sunny position that dries quickly after rainfall. Partial or full shade directly reduces the yield.
Spacing, depth and direction
The following measurements work well for garden beds:
- Row spacing: around 60 to 70 centimetres
- Spacing within each row: 30 to 35 centimetres between tubers
- Planting depth: approximately 8 to 10 centimetres
Set the potatoes into a shallow hollow with the shoots pointing upwards, then cover them loosely with soil. In very light sandy soil, they can be planted slightly deeper; in heavier ground, stay towards the shallower end of the range.
Earthing up potatoes: why this step can double the harvest
When the plants reach around 20 centimetres in height, the crucial task follows: earthing up, also known in gardening circles as “butting”. Using a hoe or spade, draw soil from both sides towards the stems to create a small ridge.
This offers several benefits:
- New tubers form within the protected, loose soil ridge.
- Potatoes are shielded from light, preventing them from turning green.
- Weeds between the rows are buried.
- The soil retains moisture more effectively.
A second earthing up is usually needed after two to three weeks, once the plants have grown further. Those who carry out this work consistently will see a clear difference when harvesting into boxes.
Potatoes on balconies and terraces
The same basic principles apply to containers, bags and raised beds. The main requirements are enough space for each plant, at least 20 litres, well-drained compost and regular watering.
One easy method is to fill a sturdy planting bag with loose compost, add two or three chitted tubers, cover them lightly with soil and gradually top up with more compost as the plants grow. This creates a small ridge in the bag as well.
Common mistakes and how to avoid them
Many harvest problems can be traced back to a small number of causes. Typical pitfalls include:
- Planting too early: tubers rot or remain stalled for weeks.
- Waterlogging: roots and tubers quickly rot, particularly in hollows and heavy soils.
- Persistent rain without protection: soil becomes muddy and hard, while plants suffer from a lack of air.
- Not earthing up: tubers sit too close to the surface, turn green and become inedible.
Anyone familiar with their plot can take preventative action: in wet positions, plant on low ridges; in exposed gardens, protect young shoots from late frost with light horticultural fleece if necessary.
Extra practical tips for better yields and flavour
Low-growing herbs such as dill or calendula can be planted between potato rows. They add variety to the planting scheme and may confuse pests. Strongly scented plants such as tagetes are often used to reduce nematodes in the soil.
Regular mulching, for example with thin layers of grass clippings, keeps the soil moist for longer, suppresses weeds and protects the topsoil from capping. However, grass clippings must never be applied in thick, wet mats, as this can lead to rot.
Some gardeners choose a combination of early, maincrop and late varieties. This spreads the harvest across many weeks and lowers the risk of crop failure caused by heat, heavy rain or pests. The approach is particularly worthwhile in small private gardens.
By paying attention to all these points - soil temperature, structure, healthy planting stock and consistent earthing up - a simple potato bed can become an impressively productive plot. Even just a few square metres can easily provide several sacks of home-grown, flavoursome tubers.













Comments
No comments yet. Be the first to comment!
Leave a Comment