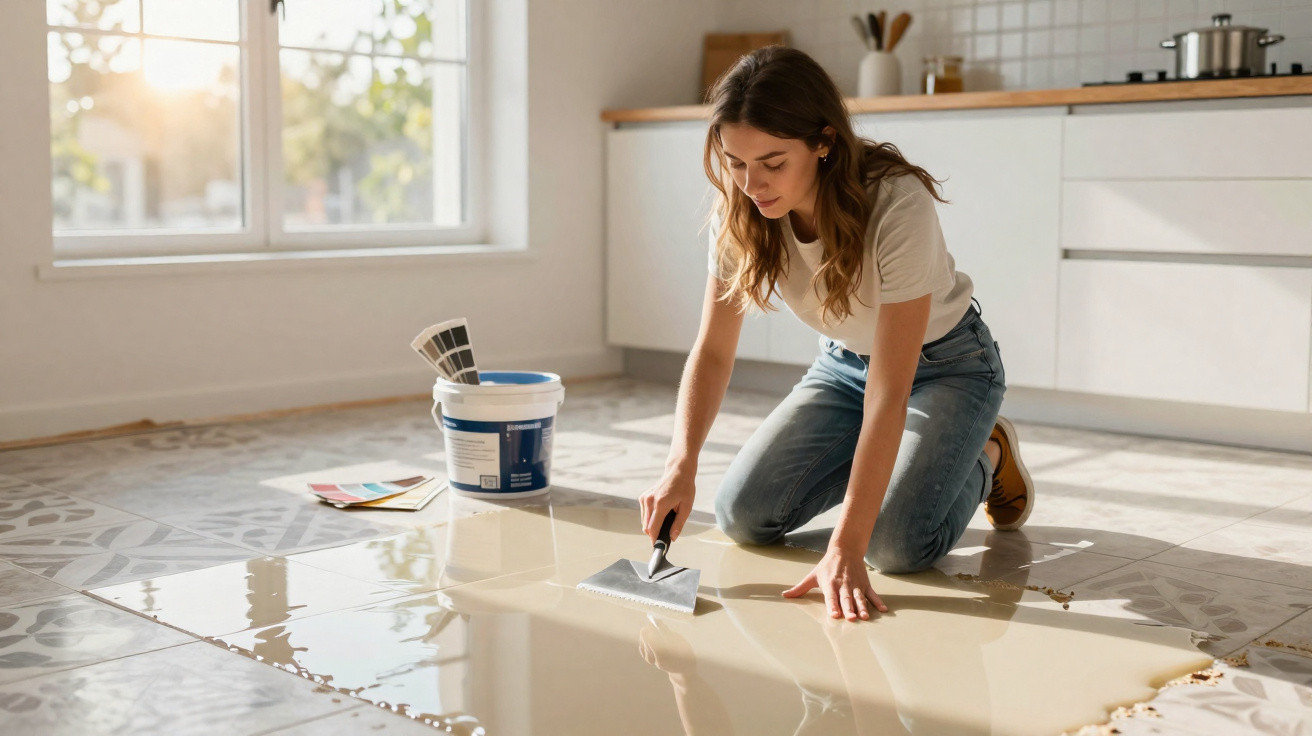
Many homeowners know the dilemma all too well: the tiles are technically sound, but visually they seem stuck in the 1990s. Anyone unwilling to endure days of building-site disruption wants a solution that looks contemporary, stands up to daily life and does not require a sledgehammer. This is where a type of flooring long established among professionals comes in – and is now becoming increasingly popular in private homes too.
Why a new floor without demolition is now a realistic option
Replacing tiles in the traditional way is a sizeable undertaking. The old surface has to be removed, tiles chipped away, rubble disposed of, the subfloor rebuilt and only then can the new floor be laid. It brings dust, drilling noise, furniture piled up, rooms out of use and a budget that can quickly spiral.
People who have just taken over a flat often face the same choice: live with a floor they dislike or begin a major renovation project. This is precisely where refurbishing the existing covering, rather than destroying it, has clear appeal.
A solid yet dated tiled floor no longer has to be removed – it can be coated seamlessly and given a completely new appearance.
The concept is simple: a continuous coating is applied over the old tiles, concealing the grout lines, creating a smooth surface and making the room appear larger. There are no longer joints where dirt can collect, while the result is closer to a modern loft floor than a grandmother’s kitchen.
Resin flooring instead of tiles: how the coating works
The method originally came from industrial settings and public buildings: decorative resin floor coverings, usually based on epoxy or polyurethane. They are applied in liquid form and cure into a durable, seamless surface.
The material covers the tiles like a skin – grout lines included. The room immediately feels calmer, more modern and often brighter too. Colour choices range from warm beige shades and cool concrete greys to crisp white and bold accent colours.
Rooms where resin flooring is particularly worthwhile
As the covering is waterproof and hard-wearing, it is suitable for almost every living area:
- Kitchen: easy to clean, with no grout lines to absorb grease splashes
- Bathroom and cloakroom WC: moisture-resistant, with a slip-resistant finish available
- Hallway: resistant to outdoor dirt and shoes
- Living and dining area: a calm, continuous surface that showcases furniture more effectively
The surface can be finished in matt, satin-matt or gloss. A matt finish has a more Scandinavian, pared-back feel; glossy surfaces recall high-end showrooms; and satin-matt sits between the two, currently making it a favourite among many interior designers.
What the existing tiled floor must be like
As appealing as this option sounds, it is not suitable for every old surface. The condition of the substrate is crucial. The floor must not move or come loose, otherwise the new covering will eventually detach as well.
A thorough inspection is therefore required before work begins:
- Tap the tiles: if a tile sounds hollow, it is no longer properly bonded.
- Check for loose sections: any tiles that move must be removed and replaced.
- Repair cracks and chips: damage is filled with levelling compound.
- Rule out moisture: the substrate needs to be dry, otherwise blistering may occur.
Only a stable, dry and clean tiled floor is suitable as a base – otherwise the problems simply remain beneath the new layer.
The grout lines should also be cleaned and, if necessary, lightly filled. The aim is to produce a surface that is as level and closed as possible, so that no depressions show through later. On very smooth tiles, a bonding primer helps improve adhesion between the old covering and the resin.
How preparation is carried out in practice
The preparatory work determines both appearance and durability. Professionals therefore follow a clear sequence:
- Thorough cleaning: completely remove dust, grease, soap residue and care products.
- Allowing the floor to dry: the surface must dry fully before the next stage.
- Checking the tiles: secure or replace loose tiles and fill cracks.
- Treating the grout lines: fill depressions to create an even surface.
- Applying bonding primer: use a specialist primer appropriate to the type of tile.
These stages may seem unremarkable, but they decide whether the new floor lasts for many years or develops problems after a short time.
Do it yourself or hire a specialist?
Complete resin flooring kits are appearing in DIY shops more and more often. A capable DIYer can certainly use them in small, straightforward spaces – such as a cloakroom WC or a very small kitchen.
Basic systems start at around €18 per square metre for materials. That may sound tempting, but it requires discipline: the material has only a limited working time, air bubbles must be worked out, and achieving an even layer thickness takes some practice.
For larger rooms, a continuous floor from the hallway through to the living room, or heavily used bathrooms, many people prefer to rely on professionals. Depending on the system, colour choice and finish, specialist firms typically charge between €100 and €150 per square metre. This includes preparation, materials, application and often a final protective layer.
Anyone wanting a perfectly smooth, almost joint-free surface without tool marks will often be better served by a specialist contractor.
Resin flooring finishes that are possible
The attraction of this solution lies not only in the minimal mess, but also in its appearance. Some popular options include:
- Mineral tones: soft beige and sand shades, ideal for warm, welcoming rooms
- Concrete look: cool grey variations for a loft-style feel and minimalist interiors
- Light plain surfaces: white or off-white can make small bathrooms look larger
- Slip-resistant textures: lightly textured finishes for showers and bathrooms to reduce slipping
Those who prefer can work with variations: for example, a lightly textured, grippier finish in wet areas and a somewhat smoother satin-matt surface in the living area. This keeps the look consistent while ensuring the function is suited perfectly to each room.
Care, durability and potential risks
One major everyday benefit is that the floor has no grout lines where dirt or limescale can build up. A wipe with a mild cleaner is usually enough.
However, cream cleaners, steel wool and extremely harsh products can roughen the surface. It is better to use cleaners specifically approved for these types of coverings. Furniture with hard edges should be fitted with felt pads to prevent scratches.
With good preparation and proper installation, its service life can certainly match that of conventional tile flooring. If its appearance fades after many years, it can be refreshed later with a new top coat.
There is a risk where moisture rises from below or where the original tiled floor is already severely undermined. This can lead to blisters, detachment or cracking. A professional assessment beforehand is therefore worthwhile, especially in older buildings or basement rooms.
Who benefits from a seamless floor over old tiles
Coating old tiles is especially suitable for anyone who:
- wants to modernise their home without days of demolition work
- prefers a calm, continuous floor appearance
- is planning an easy-care bathroom or straightforward kitchen
- wants to make sensible use of robust but old-fashioned finishes in older properties
Anyone who values clean lines, minimal cleaning effort and a quick transformation effect will find resin flooring an appealing alternative to new tiles or vinyl. A combination can also be effective: the seamless covering is used in high-traffic areas, while parquet or laminate remains in bedrooms.
To prevent the decision becoming an expensive planning mistake, it is worth arranging a sample appointment. Many specialist firms provide small sample boards in different colours and sheen levels. This makes it easier to judge how your own room may look later – and whether moving away from the old tile pattern is the right choice.






Comments
No comments yet. Be the first to comment!
Leave a Comment