The first time you notice it, you may not be certain what happened.
There is a muted crunch or hollow click beneath your heel, in the spot where the bath mat normally conceals the floor. You put your foot down again: the same sound, the same slight and unsettling movement from a tile that should be completely firm. All at once, the bathroom feels less secure and less complete, as though it is quietly deteriorating out of sight.
While brushing your teeth later, you find yourself watching that tile, then the grout line beside it, then a fine crack you are convinced was not there last month. In less than ten seconds, your thoughts leap from “annoying” to “water damage” to “this is going to cost a fortune”. Somewhere amid late-night scrolling and silent DIY videos, an idea appears.
Perhaps you could repair it yourself.
Why bathroom floor tiles become loose
Loose bathroom tiles rarely fail in a dramatic way; instead, they gradually shift. One day they feel firm, and the next they produce an odd hollow noise when tapped with a knuckle. Although the room appears unchanged, something beneath the surface has failed: adhesive may have become brittle, the subfloor may have moved, or a small leak may have been soaking into the wrong area for months.
What feels like a “loose” tile is actually a tile that no longer has a secure bond with the layer beneath it. It may bend slightly underfoot or rise almost imperceptibly at a corner. If ignored, it creates an entry point for water and a weak spot that can cause nearby tiles to loosen too. That is how one unstable square can become a floor full of rattles and patches.
There is a fact many people do not realise: in many British homes, bathroom tiles sit over boards or screeds that have already shifted slightly by the time the tiler has finished. A survey of several UK contractors identifies moisture and movement as the leading causes of loose tiles, well ahead of “bad workmanship”. Consider Emily in Leeds. She first detected a soft click from one tile close to the shower. Six months afterwards, three tiles along the wall had lifted a little, while a brown mark appeared on the kitchen ceiling below.
She had not flooded the bathroom or altered the length of her showers. The floor had merely found a vulnerable point and steadily exploited it. Fine gaps in the grout, daily shifts in temperature, steam and a small amount of water left after the children’s bath all played a part. The loose tile was not simply unattractive; it was a warning sign.
Tiles, adhesive, grout and the subfloor all expand and contract at different speeds. Bathrooms are harsh environments for that interaction. Hot showers, cold evenings, underfloor heating cycling on and off, and even a slightly bouncy floorboard can all put pressure on the bond. Eventually, rigid adhesive can fracture away from the tile or the substrate. Water then enters the gap, weakens the remaining adhesive and the tile starts to “debond”.
Choosing an unsuitable adhesive or failing to prime the subfloor makes this happen sooner. Add ordinary household activity - children jumping out of the bath or a heavy bottle being dropped - and a single weak area can develop. The pattern is harsh but straightforward: when one tile becomes loose, adjacent tiles experience more movement and moisture. The key is to halt that chain reaction quickly.
How to fix a loose bathroom floor tile step by step
The most sensible approach to a loose tile is to handle it as a small, contained operation. First establish exactly which tiles are affected by gently tapping them with a metal spoon or screwdriver handle. Secure tiles make a dense, dull sound, whereas loose ones sound hollow or slightly “drummy”. Make a mental note of them, or mark them with low-tack tape.
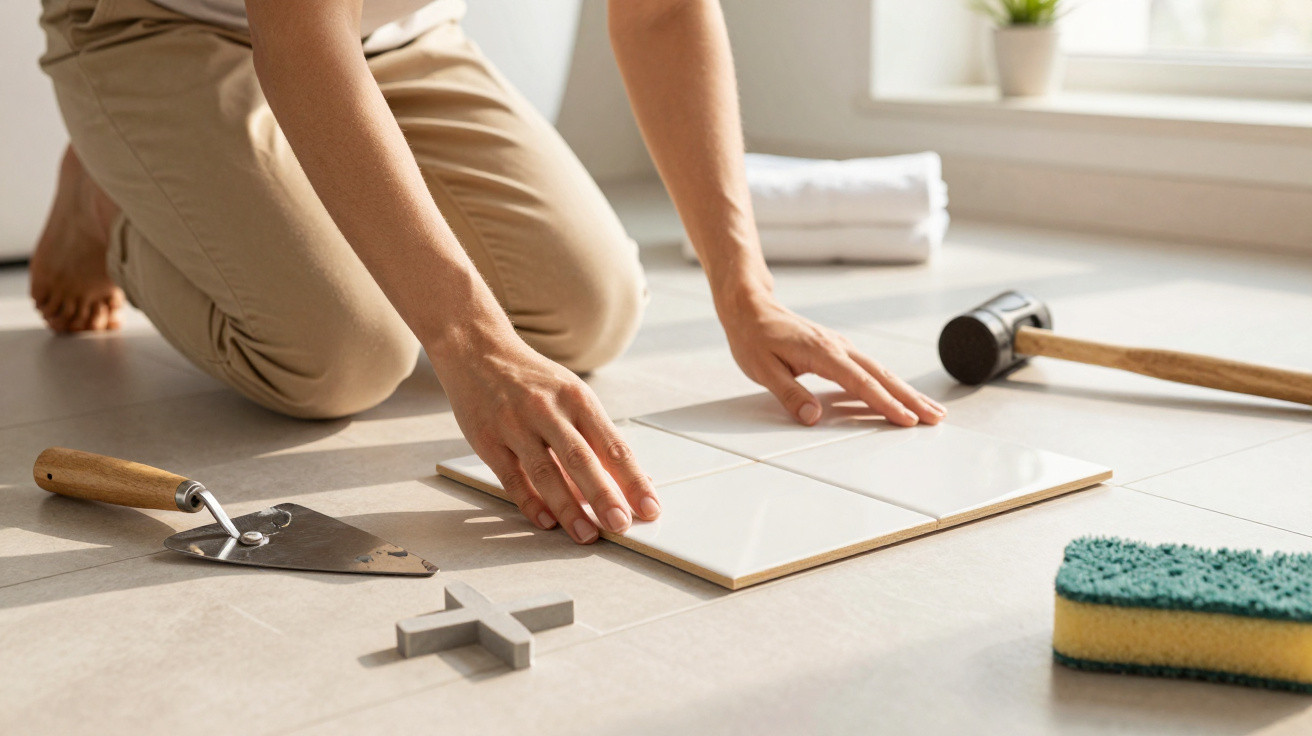
Then remove the grout surrounding the loose tile with a grout saw or a multi-tool fitted with a grout blade. Go carefully, particularly around the corners. When the grout has been removed, slip a thin putty knife or scraper beneath one edge and gently work the tile upwards. If it will not lift easily, use a hairdryer to warm it slightly and soften the old adhesive. The objective is to remove the tile whole rather than break it.
Scrape the old adhesive from both the underside of the tile and the floor below until the surfaces are clean and reasonably level. Vacuum away the dust, wipe the area with a lightly damp cloth and allow it to dry. A dark, swollen or crumbly subfloor is a warning sign of water damage; in that case, seeking professional advice is sensible.
Where everything appears sound, spread fresh flexible tile adhesive with a notched trowel and comb it into straight lines. Set the tile back in position, turning it gently as you press it down to bed it properly. Remove excess adhesive and leave the tile undisturbed while it cures. Afterwards, re-grout the joints by pushing grout fully into the gaps, then wipe the surface clean with a damp sponge. It is a straightforward job, provided it is done carefully and methodically.
This is often the point where people feel anxious, which is entirely understandable. You are kneeling on a cold floor, holding a chisel, trying not to chip surrounding tiles or undermine your own confidence. The trick is to accept that you’re not racing anyone. Pause when needed, and compare the tile’s level and alignment with its neighbours before the adhesive begins to set.
One frequent error is choosing unsuitable adhesive or grout, often simply because it was the tub on special offer. Bathroom floors require flexible, waterproof adhesive and grout capable of tolerating movement. Another common issue is applying the adhesive too thinly or failing to comb it into lines that let air escape. This creates voids under the tile and can leave the very same tile loose again a year later.
Realistically, no one cleans and checks grout lines every day. Small cracks can remain unnoticed for a long time, especially behind the toilet or beside the bath panel. For that reason, when repairing a loose tile, it is worth checking the nearby grout and renewing any sections that are missing or crumbling. A few additional small tasks now can prevent much larger problems later.
There is a quiet sense of achievement when the repaired tile finally feels firm again. There is no movement or hollow rattle beneath your heel. You put your weight on it and feel the solidity return, as though the room itself has relaxed. One homeowner told me:
“I thought I’d open up the floor and discover a disaster. In the end, it was one loose tile, an evening on my knees, and the strange joy of fixing a thing I used to walk over without thinking.”
Keep this quick mental checklist in mind as you work:
- Check for hollow-sounding tiles beyond the clearly loose tile.
- Remove grout gradually to avoid damaging neighbouring edges.
- Clean, dry and inspect the subfloor before applying fresh adhesive.
- Choose flexible adhesive and grout rated for bathroom use.
- Leave enough curing time before showering or putting the floor under heavy use.
Living with a repaired bathroom floor
After the adhesive has cured and the grout joints have dried, the way you use the room changes slightly. You no longer avoid that “dodgy bit” of flooring. Taking a shower feels less like a compromise and more like it did in the first week after the bathroom was completed. The repair may be small and localised, but it restores a sense of control over the space.
Most of us have experienced a home issue that seems to be quietly criticising us. A loose tile carries that feeling. Repairing it does more than protect the subfloor and prevent water ingress: it stops the persistent low-level irritation of hearing your heel click in the wrong place. Once you have completed one repair, the rest of the bathroom can look less like a delicate, mysterious system and more like a collection of parts you can maintain.
Not every loose tile is suitable for a DIY repair. Some signal more serious problems, such as structural movement or long-term leaks hidden below the surface. Even so, investigating one suspicious hollow tile often encourages better routines: spotting cracks early, drying puddles near the shower tray and ventilating the room well after steamy baths. These small, casual habits help tiles remain bonded and keep the floor stable.
The next time you notice that faint crunch beneath your heel, the story you tell yourself may be different. Rather than panic or think “this will ruin everything”, you may have a calmer, more confident response.
I know what to do about this.
| Key point | Detail | Benefit for the reader |
|---|---|---|
| Identifying a defective tile | Tap each tile gently and listen for a hollow sound or feel for slight movement | Helps identify problems early, before water damage spreads |
| Preparing and reattaching it correctly | Remove the grout, clean away old adhesive and use flexible adhesive suitable for a bathroom | Extends the life of the repair and prevents the work needing to be repeated |
| Checking the substrate and moisture | Inspect the substrate for swelling, stains or crumbling | Helps distinguish one loose tile from a more serious structural issue |




Comments
No comments yet. Be the first to comment!
Leave a Comment